


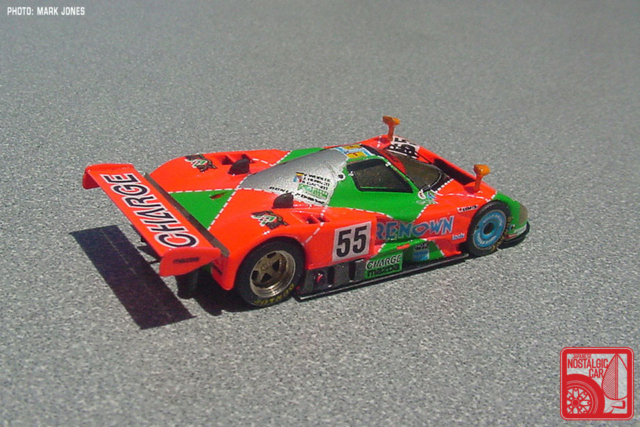
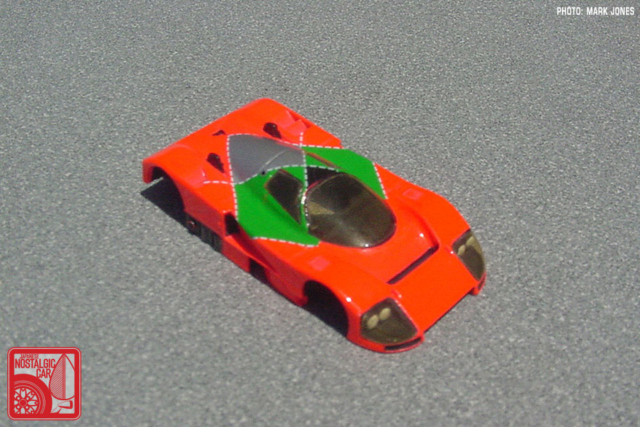
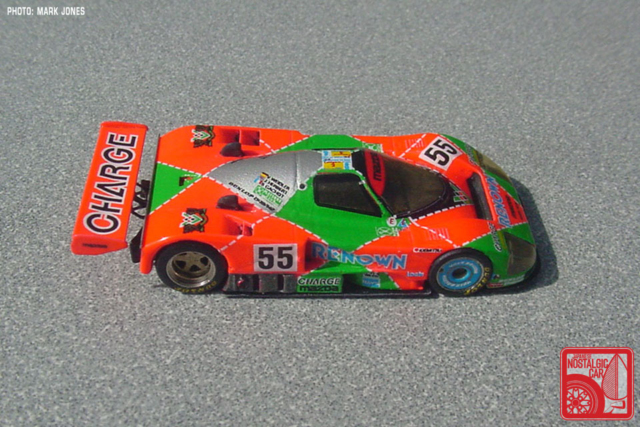
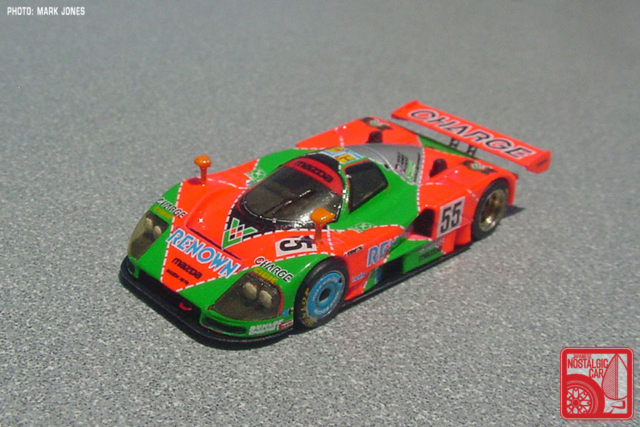
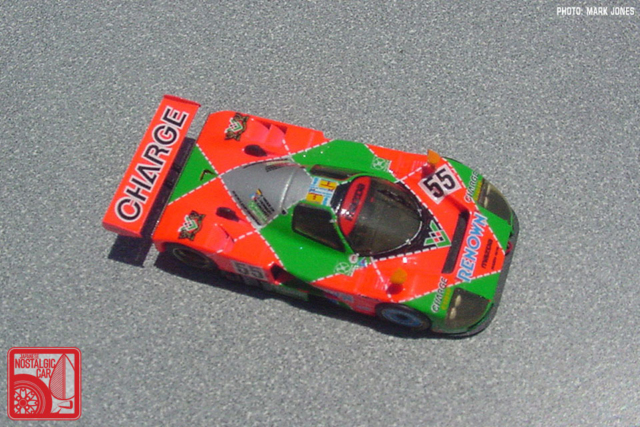
The 1991 Mazda 787B needs no introduction. Its iconic orange and green paint scheme is one of the most recognizable liveries ever to grace a Le Mans winner. Due to its historic nature countless models of this car have been made, many of which are from companies even serious collectors have never heard of. As a challenge, I decided to make one of the smallest 787Bs out there, just two inches in length and about half the size of a Hot Wheels, as detailed as possible.
For those not familiar with my work, I go by Scale-Master and build detailed replicas in a variety of sizes, from 1/24 plastic model kits to Hot Wheels. I typically add my own level of detail to them, whether it’s an accurate racing livery or something from my own imagination. You can see some of my previous work that has been featured on JNC.

This Mazda 787B started life as a 1/87 scale model from Le Mans Miniatures. The resin kit was produced in 1991, fresh off the legendary quad-rotor prototype’s fairy tale win at that year’s 24 Hours of Le Mans.
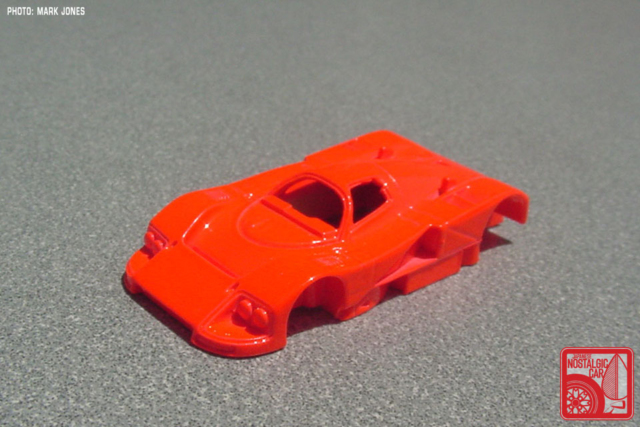
The bodies on all the kits in this series I’ve seen were pre-painted. That’s a boon most of the time, but in my case it makes touch up of the fluorescent colors a bit of a challenge (and it does need touching up).
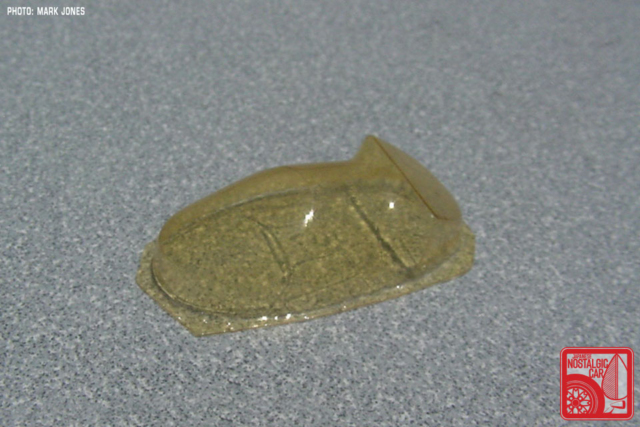
The pieces of the kit are like a multi-blister Hot Wheels card. The first step was to cut out the windows and headlight covers from the material, but the clear vacuum-formed plastic was super brittle. The windshield split in two places while I was cutting the side windows out. Thankfully, the kits usually provide two sets of those parts, so I used the second set for the windshield. The headlight covers were, surprisingly, the easier parts to trim to fit.
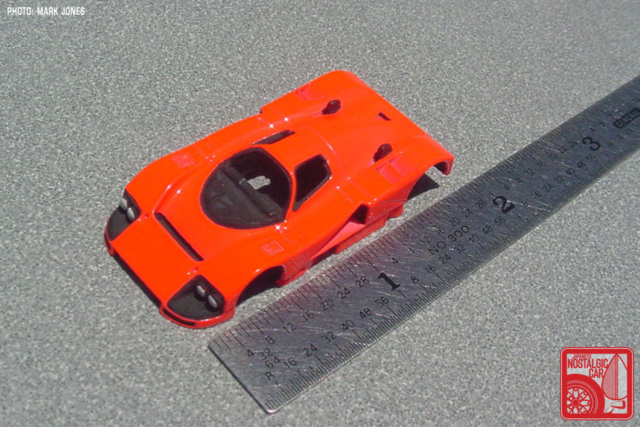
Before installing the clear parts the interior and headlight buckets needed to be painted. As you can see, the body of the car, minus wing, measures less than two inches.


Tolerances need to be very tight when we’re dealing with such a small scale. The clear bits fit pretty well, especially considering the size. The kit even provides a decal for the dashboard.

The tires are soft and rubbery, which on the other cars I’ve built in this series works out as a nice feature. However, these rims are a larger diameter and the tires look to be the same stock as used on the smaller wheels from other kits.

Unfortunately they don’t stay concentrically round when stretched over the wheels. Additionally they began to split after being on the rims overnight. So, I machined a new set of tires.
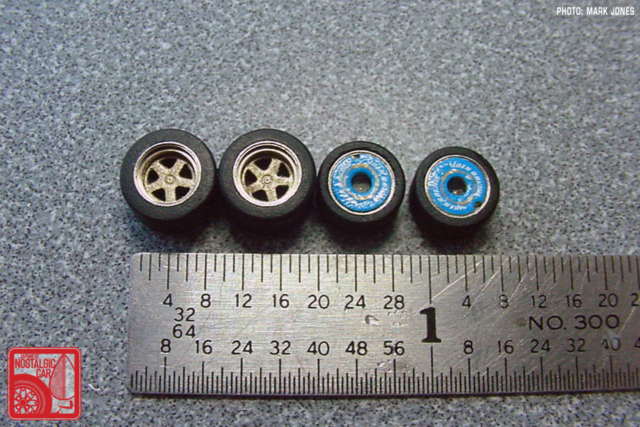

The resin wheel centers for the front fit very well, and the kit comes with decals for the fronts. The photo-etched rears wheel centers, on the other hand, took a good amount of sanding and shaving to fit as deep into the rims as they should. The Dunlop tire lettering is included too.
The green and silver area around the canopy is the first decal for the body graphics. It took about 30 minutes to apply.
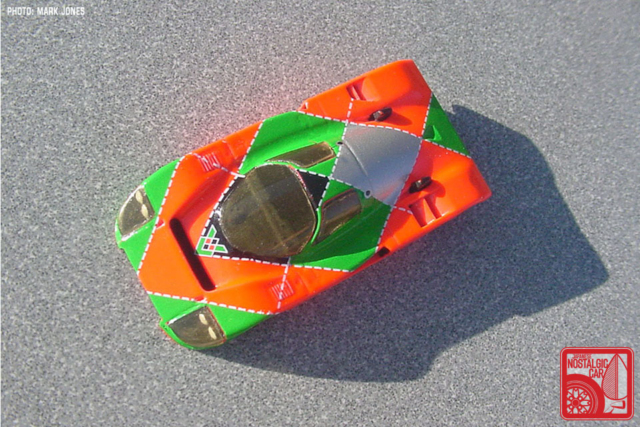
With green areas over each headlight and at the rear, dotted lines on either side of the body, and the argyle pattern just fore of the windshield applied, that’s four more decals. It required a good 90 minutes to get them all down. The two around the headlights took the most work.

There are a few nice little photo-etched parts for the rear end. This is the first to be installed. I still need to trim/touch up the decal before fitting the Gurney flap.

The two side graphic decals were laid out on the sheet on the wrong sides. The other decals are laid out on the sheet as they should go onto the car. After a little head scratching, I figured it out. These were more difficult to get to conform than the previous ones. Even on the correct sides, they were a bit short in the rear areas.


Fortunately the kit includes a small section of green decal to patch with. It also provides a section of white dotted lines. It took two pieces of the green to fix each side. The rear wing is photo-etched, perhaps made of nickel (though definitely not brass). It comes pre-stamped to give it an airfoil of sorts. The wing tips are for sure brass photo-etched.


All the decals have been applied. There were a couple tiny green areas that I touched up with Tamiya X-28 Park Green. I was pleasantly surprised at how close it matched these decals, but then it did a good job in the same application on the Tamiya kit of the same car.
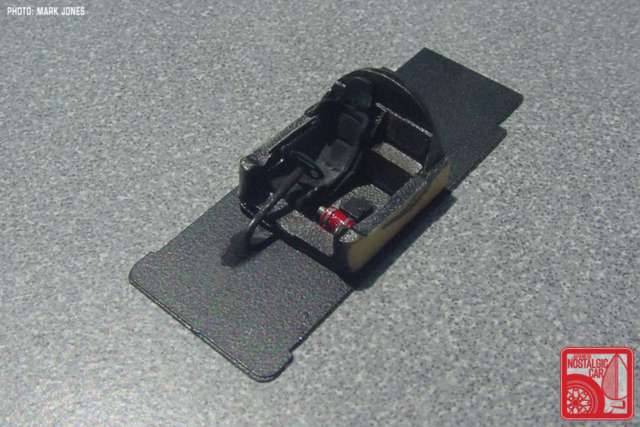
The interior is one piece of resin. I cemented it to the photo-etch chassis. The steering wheel is photo-etched too, with a pin for the steering column.
Finally, the wheels, Gurney flap, and wing are installed. There’s even a little photo-etched tow ring for the front.

The mirrors were fun. The bodies are resin and the kit provided tiny thin photo-etched posts. The resin parts were not painted and the PE ones were, but they were very undersized so I made new posts from thin strips of styrene. I found a fluorescent orange Tamiya paint pen that did not need a white base to cover well and brush painted the mirror parts. Chrome silver paint will have to do for the mirror faces.
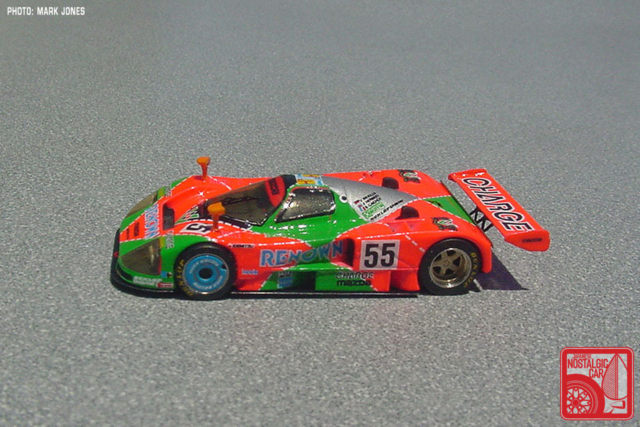
Finally, it’s done. The last piece was a wiper blade on the windshield. Now, this tiny Le Mans champion is ready to take on a 1/87 Circuit de la Sarthe. Race cars are difficult due to the extensive decals required for their liveries, but when you have a car that’s as historic as the Mazda 787B, it’s well worth the effort.
Additional Images:


Nice work. I have a Tamiya Group C Nissan and I am afraid of the decals.
(In my to do pile for about sixteen years). Was this was the same amount of detail as a 1/43 ?
Yes Nigel, right on par with other 1/43rd kits of the era, just smaller parts.
As for the Tamiya kit(s), the decals in them are very nice and workable. The key is to use a good decal solvent to help them conform. Tamiya has two of them; Mark Fit and Mark Fit Strong. While both are good to have on hand, I use the strong most of the time, like on this little 787.
Very impressive! Would you mind sharing what kind of tools you used?
Sure Michael, and thanks!
The same basic tools I use for other scales were employed for this. X-Acto knife, jewelers files, fine sandpaper, tweezers and small scissors to trim parts of the clear parts. I used a Sherline mill to make the tires.
Nice work! In my younger days I was obsessed with car models. When I was 12 into my teens, before my obsession with JNCs, I was obsessed with American muscle, and regretably, NASCAR. But I really enjoyed building NASCAR models simply for the paint schemes and decals. It was challenging but rewarding when they turned out perfectly! A bit easier at 1/24….